On the Sign PDF page, you sign a document with the certificate on your eID, through the reader connected to your Mac. You prepare the document and the visible mark, then authorize the signature with your signing PIN.
Before you start
- A connected card reader with your eID inserted. See Card readers on Mac.
- The CAN (6 digits, on the front of your eID) and the signing PIN (6 digits).
- An internet connection. The signature is made on the card, but the app gets the timestamp and the PAdES-LT validation evidence online. Without them, signing doesn’t finish.
- A PDF file of up to 50 MB that isn’t password-protected.
Step 1: choose the document
- Choose Sign PDF in the sidebar (⌘4).
- Click Choose PDFs… (⌘O) and select the document, or drag the PDF onto the area on the page.
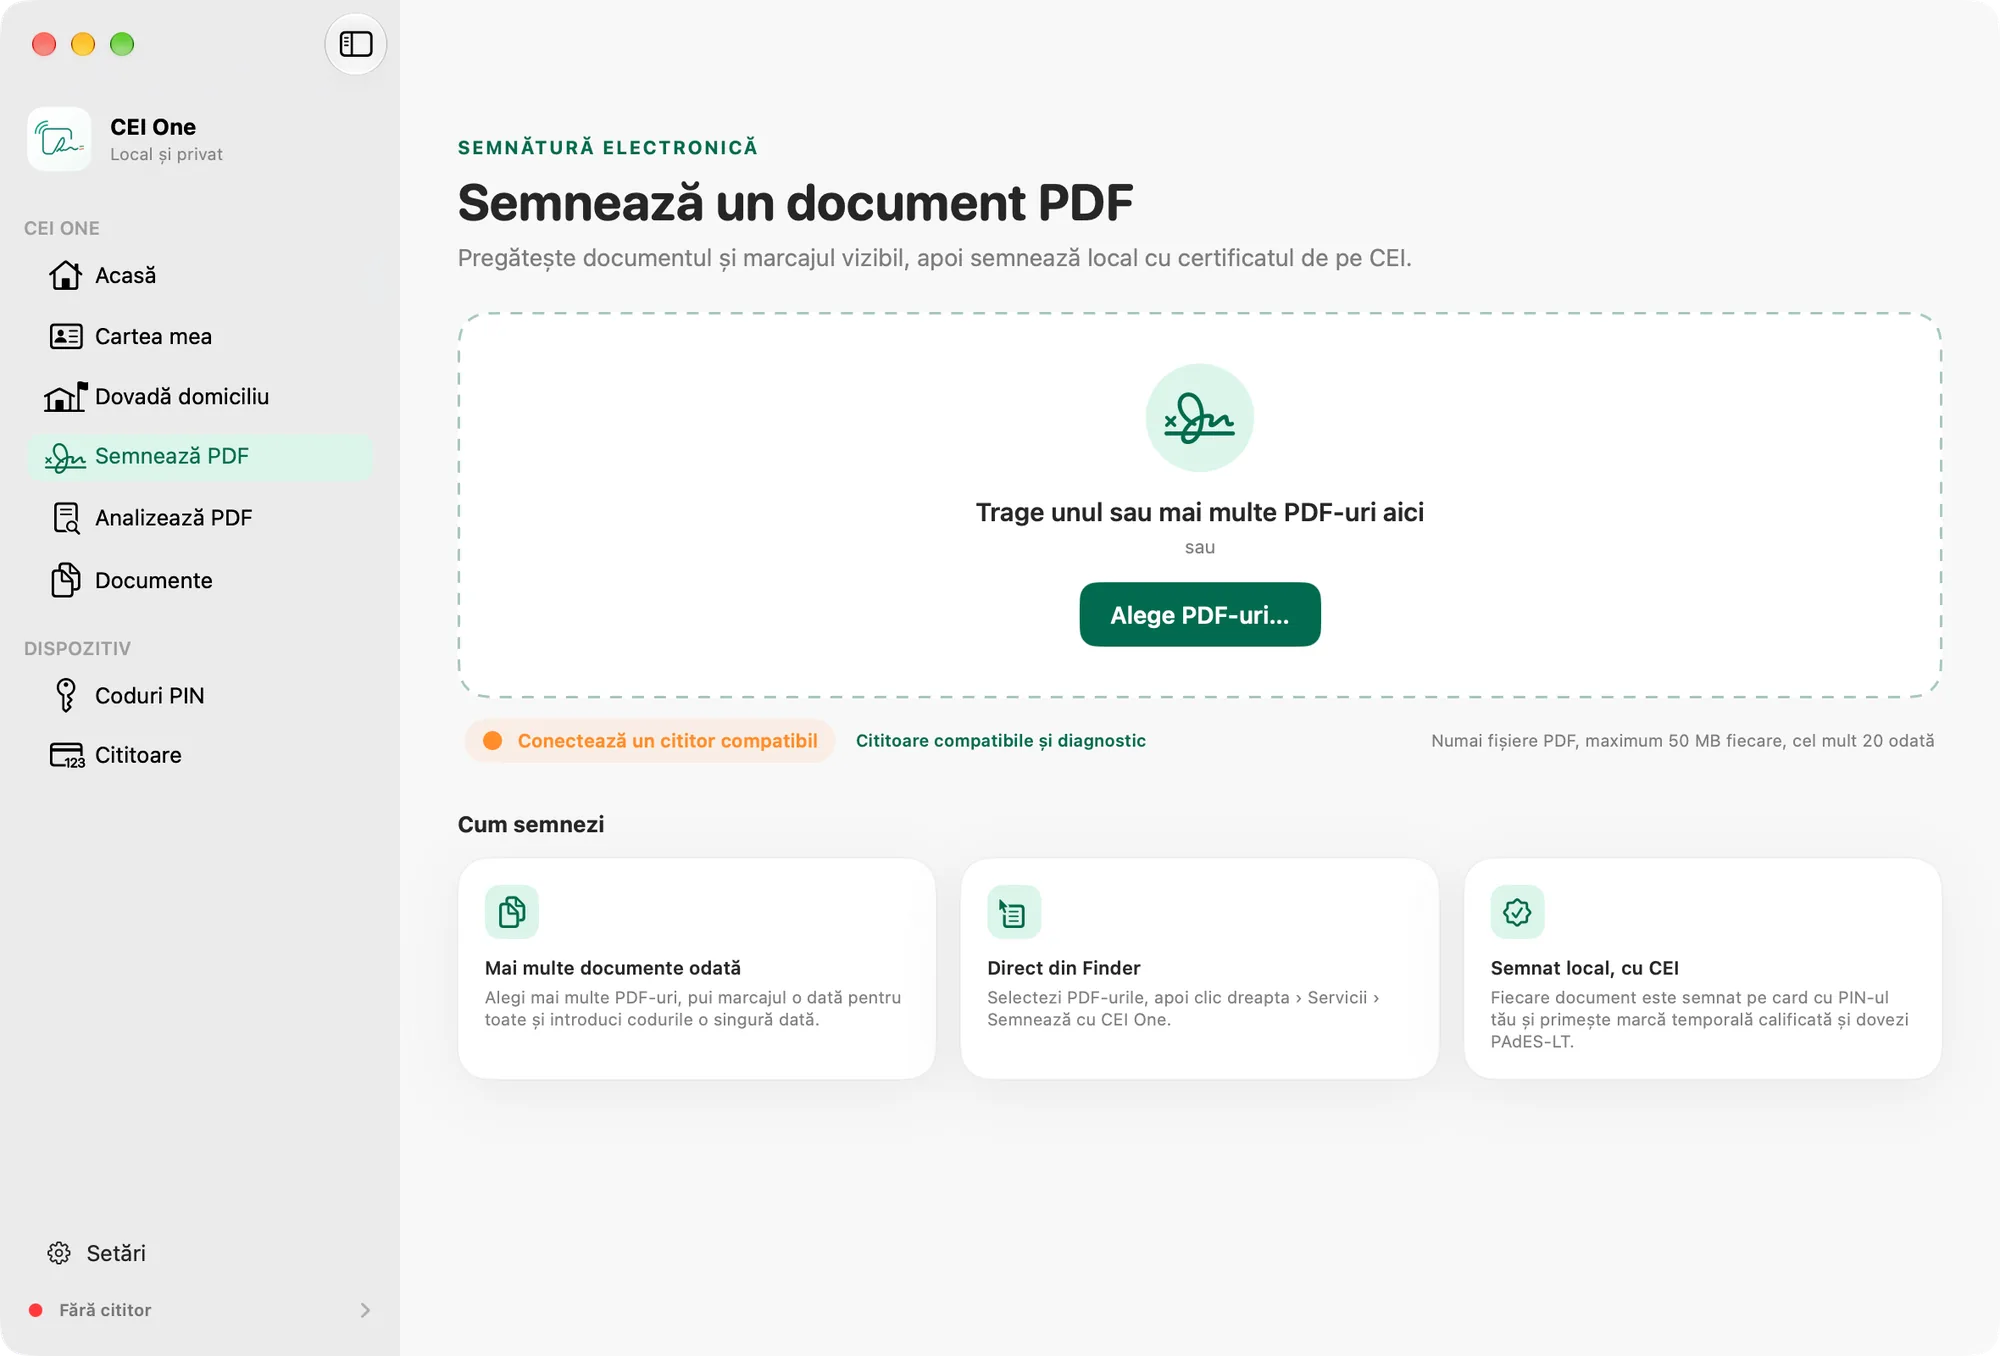
If you choose or drag several PDFs, you sign them at once, up to 20 documents. See Sign several PDFs on Mac and CEI One in Finder.
The app checks the file before it uses the card. If it can’t open the file, you’ll see one of these messages:
- “The selected file cannot be read.”
- “The selected PDF is too large to process safely.”
- “The selected file is not a valid PDF.”
- “The PDF is password-protected and cannot be processed.”
A PDF certified so that it doesn’t allow changes can’t receive a new signature.
Step 2: place the mark
The mark is the visible part of the signature on the page.
- Choose the page from the PAGES strip by clicking its thumbnail.
- Drag the mark wherever you want it on the page. It starts at the bottom right.
- Under Configure the mark, choose the Main content: Name or Handwritten signature. The handwritten signature is read from the card when you sign; you don’t need another code.
- Turn Border around the mark on or off (a green outline in the final document).
- To fine-tune the position, use the arrows under Position. Each press moves the mark by 0.5% of the page.
- Click Continue.
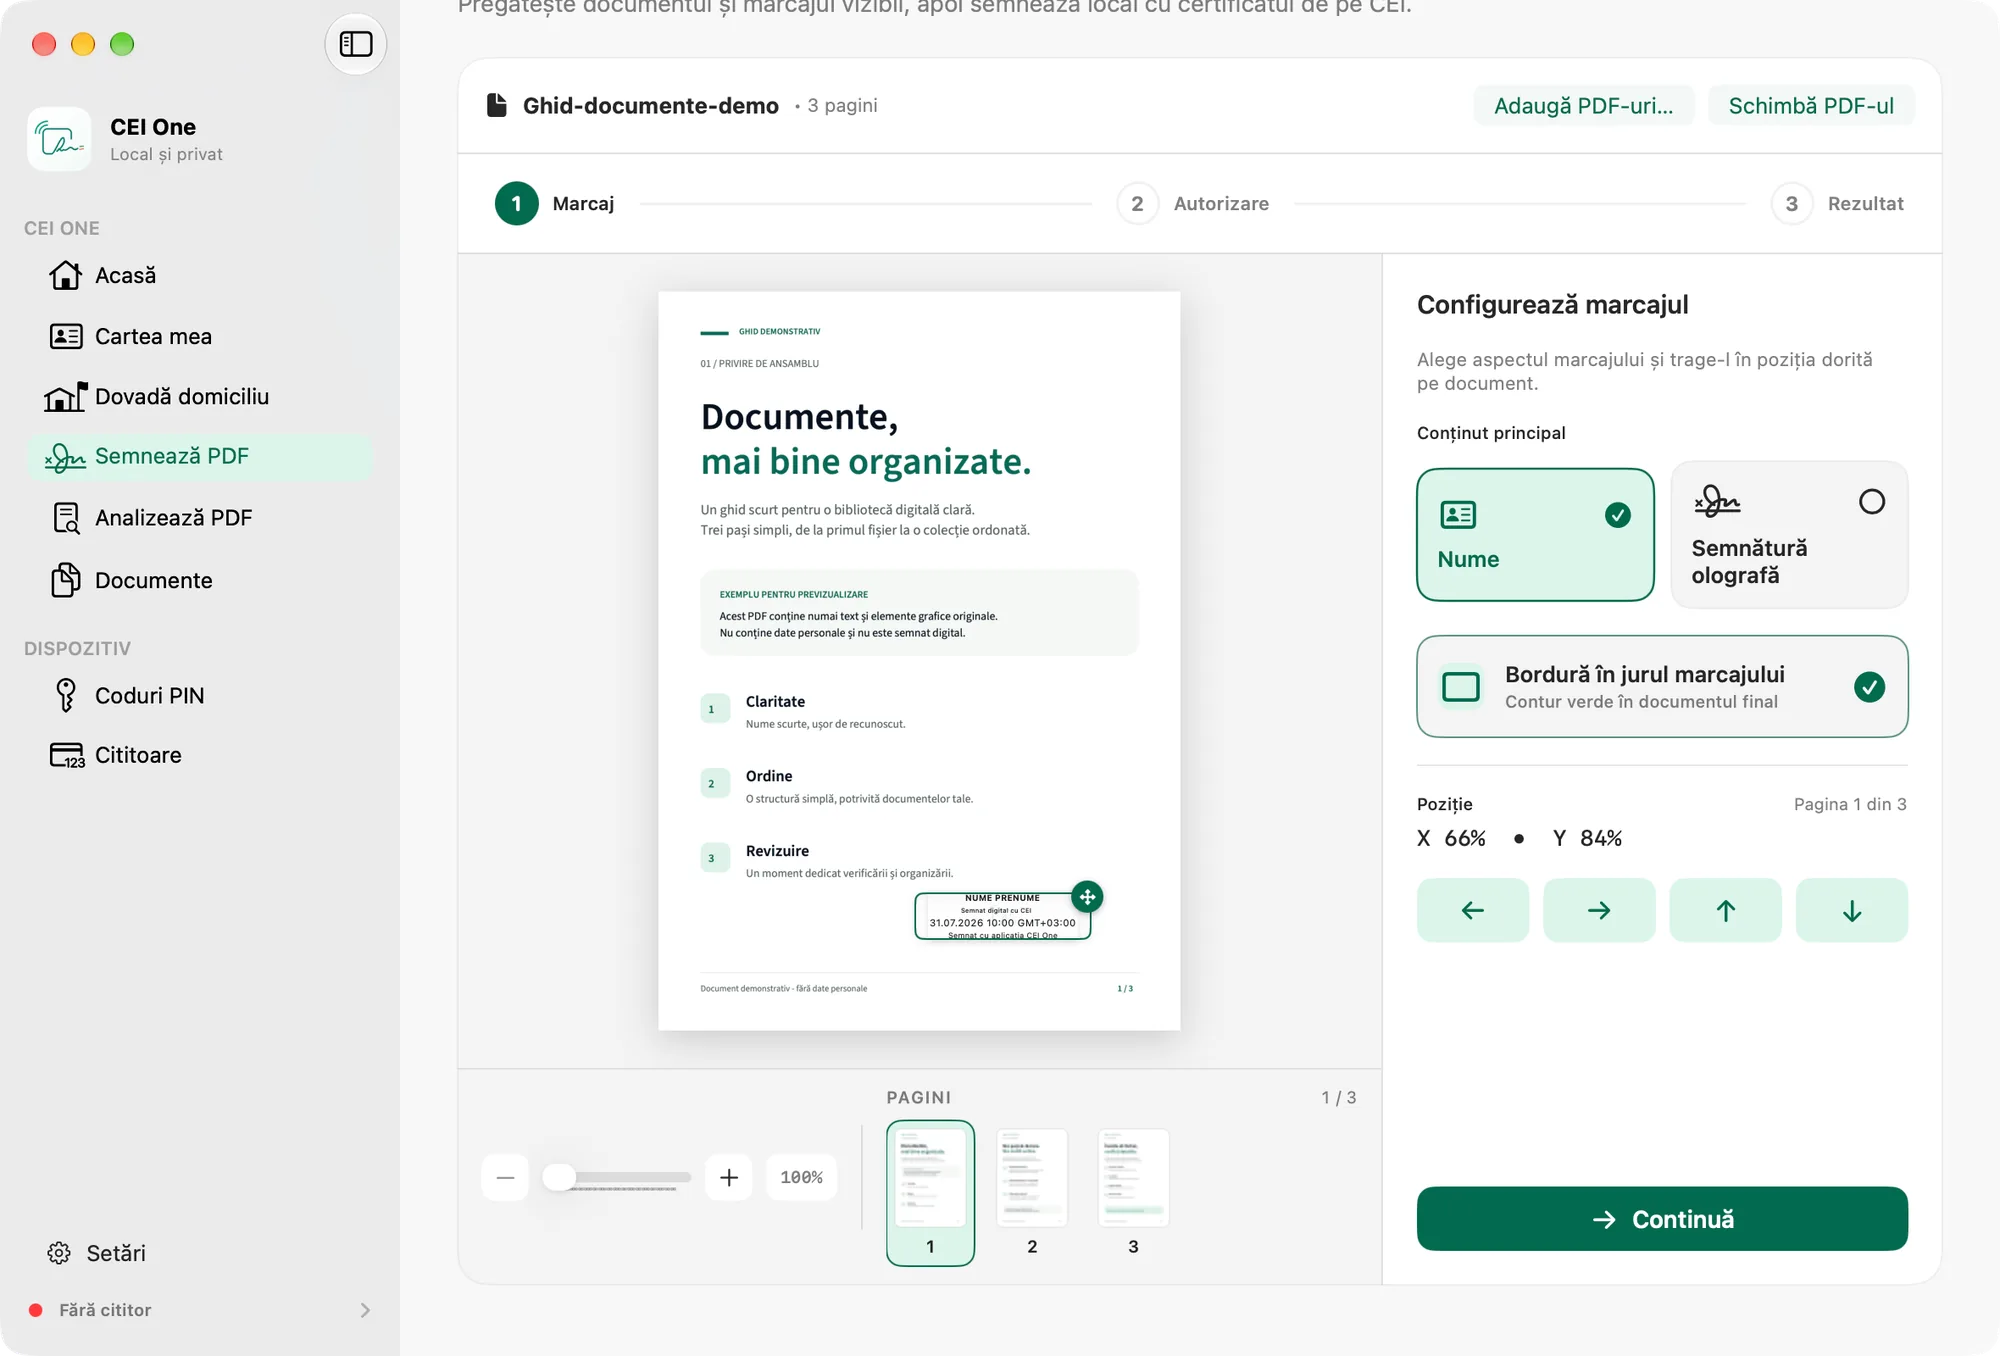
You can zoom the page with the − and + buttons, the slider or a pinch on the trackpad. Click the percentage to fit the page back to the window. To choose a different file, click Change PDF.
On the signed document, the mark shows your name or your handwritten signature, the text “Digitally signed with CEI” (the preview in the editor says “Digitally signed with eID”), the date and time of signing, and “Signed with the CEI One app”.
Note
The mark is only the visible representation. The electronic signature itself is cryptographic, and you can verify it in Analyze PDF.
Existing signatures on the page appear as dotted rectangles. If the mark lands on top of one of them, the app moves it to the nearest free spot.
Step 3: authorize signing
- Under CAN code, type the CAN. The app reads the certificate on the card, checks the PIN status and shows CAN verified.
- Under Signing PIN, type your signing PIN. The field becomes available only after the CAN is verified.
- If you want to keep the signed document in Documents, turn on Save a copy to the local library. Its starting value comes from Settings › Signing, and changing it here changes that setting too.
- Click Sign document (Return).
- Wait for it to finish. Don’t remove your eID from the reader.
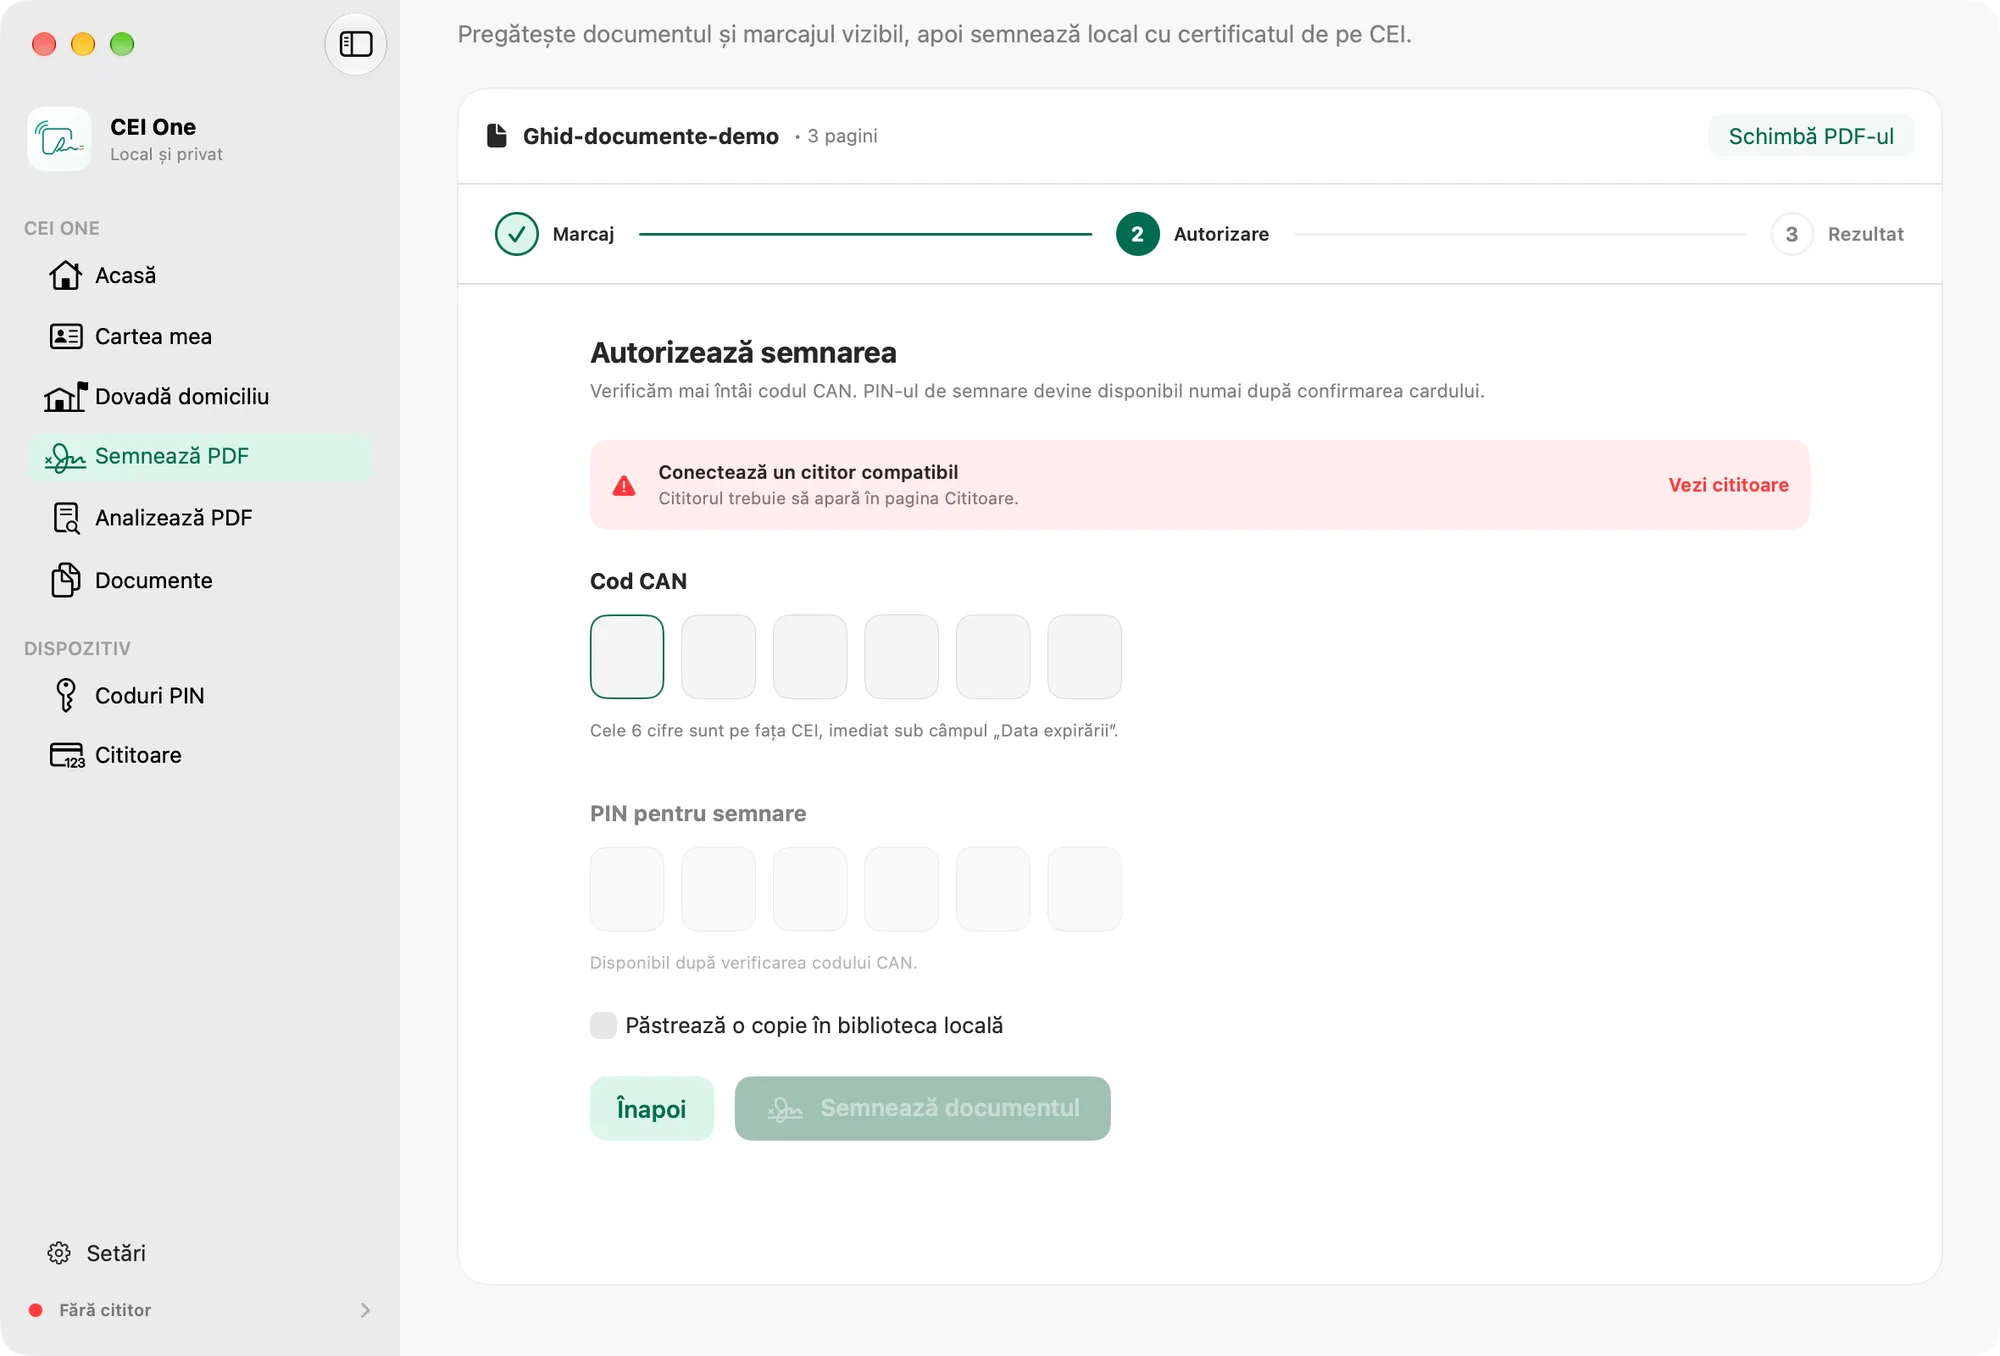
If the reader or the card isn’t ready, a red message appears above the codes, with a View readers link.
While signing, the app shows the current stage: Checking the eID and certificate, Preparing the document, Requesting signature from the eID, Obtaining timestamp and, at the end, Saving the signed copy. The timestamp stage also covers archiving the PAdES-LT evidence and the final check, so it can take longer. If you chose the handwritten signature, Reading the handwritten signature appears too.
The certificate and the PIN
If the certificate can’t be used, the app tells you why before you type the PIN. For example, the certificate has expired, isn’t valid yet, or doesn’t permit document signing.
Next to Signing PIN, you can see how many attempts you have left, when the card reports that number. On the last attempt, you have to check “I confirm that this is the last available attempt.” before signing. If your signing PIN is blocked, you can’t sign.
Important
If you see “We cannot confirm whether the card operation completed.”, reconnect your eID and check your documents before you try again.
The result
After signing, you’ll see Signed document and a summary with the Document signed with eID badge, the certificate holder, the issuer and the date until which the certificate is valid. The summary also confirms the timestamp and the PAdES-LT validation evidence that were included.
- Click Save a copy… to save the signed PDF. The suggested name is the original name followed by
-signed.pdf. - If you kept a copy in the library, you can click Open in Preview or Show in Finder.
- Click Sign again to go back to the mark.
Tip
If saving to the library fails after signing, the document is still signed. Save it with Save a copy….