On Mac, you can sign up to 20 PDF documents in a single run. You place the mark, enter the codes once, and the app signs the documents one after another.
Before you start
You need the same things as for a single document: the reader with your eID, the CAN, the signing PIN and an internet connection. Each file must be a PDF of up to 50 MB. See Sign a PDF on Mac.
Choose the documents
- Choose Sign PDF in the sidebar (⌘4).
- Drag the PDFs onto the “Drag one or more PDFs here” area. Or click Choose PDFs… (⌘O) and select several files.
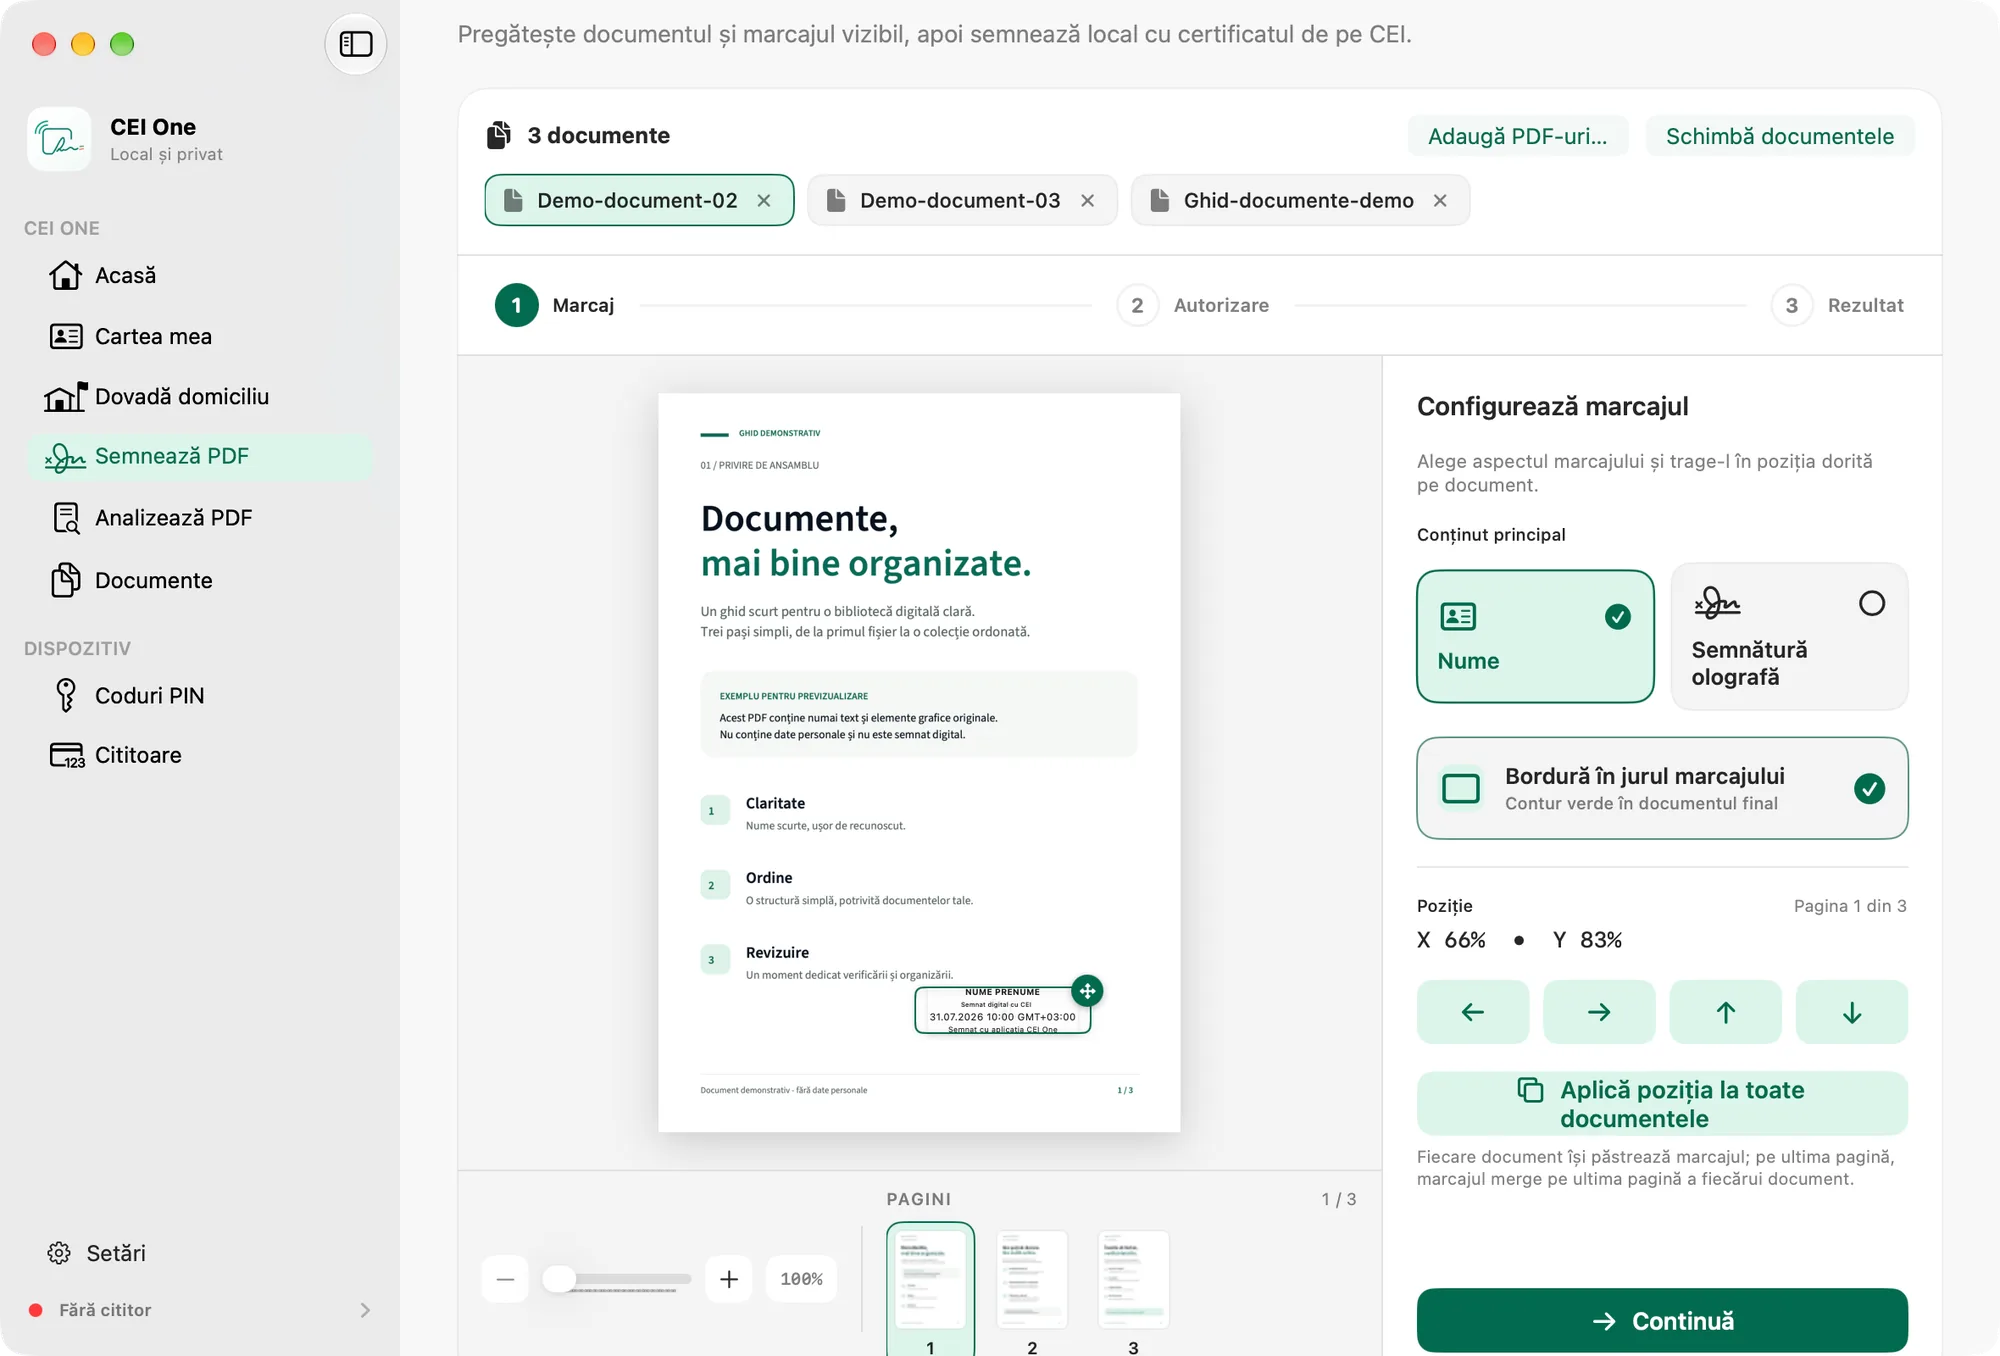
- Check the document strip at the top. It shows the number of documents and a button for each file.
If you choose more than 20 files, the app keeps the first 20 and tells you how many weren’t added. Files that aren’t PDFs are ignored.
While you’re at the mark step, you can:
- click Add PDFs… to add documents, up to 20;
- click Change Documents to replace the list;
- click × on a document to remove it from the list.
Place the mark
- Click a document in the strip to view it. Each document keeps its own page and mark position.
- Place the mark on the document shown, just as you would when signing a single PDF.
- To use the same position everywhere, click Apply Position to All Documents. If the mark is on the last page, it goes on the last page of each document.
- Click Continue.
Your choice between Name and Handwritten signature, and the border around the mark, apply to all the documents.
Sign the documents
- Type the CAN under CAN code and wait for CAN verified.
- Type your signing PIN under Signing PIN.
- Click the sign button. Its label shows the number of documents, for example Sign 3 Documents.
- Follow the progress: “Document 2 of 3”, the file name and the current stage. Don’t remove your eID from the reader.
The documents are signed one at a time, with the same codes. Each one gets its own signature, timestamp and evidence. The certificate and the handwritten signature are read only once.
If you want to stop the run, click Stop After Current Document. The app finishes the document it has started and stops before the next one.
If a document can’t be signed
- The app checks each document before it uses the card. A document that fails this check is marked and skipped.
- If a problem occurs after the card has signed (the timestamp, the evidence or the final check), only that document is affected. The run continues with the next document.
- If an error occurs while the card is signing (for example, a rejected PIN or a removed card), the run stops. The documents signed up to that point stay signed.
- If the run stops before the first document (for example, because of a wrong PIN), nothing changes. Correct the codes and start again.
Hold the pointer over a marked document to see the reason.
The result
The badge shows how many documents were signed, for example “3 of 3 signed”. If some were left unsigned, the app tells you how many.
- Save Signed Copies… asks you for a folder. The app suggests the folder of the original documents. Click Save Here. Existing files aren’t overwritten: a name that’s already taken gets a number, for example
name-signed (2).pdf. When it’s done, Finder shows the folder. - Sign the N Remaining Documents signs the documents that are still unsigned.
- Sign Other Documents clears the list so you can start over.
- View in Documents appears if you kept the copies in the local library.