With Read your eID you can see the data on your Romanian electronic identity card (eID) on your iPhone. Reading happens over NFC, right on your phone, and doesn’t need internet.
What you need
- Your eID.
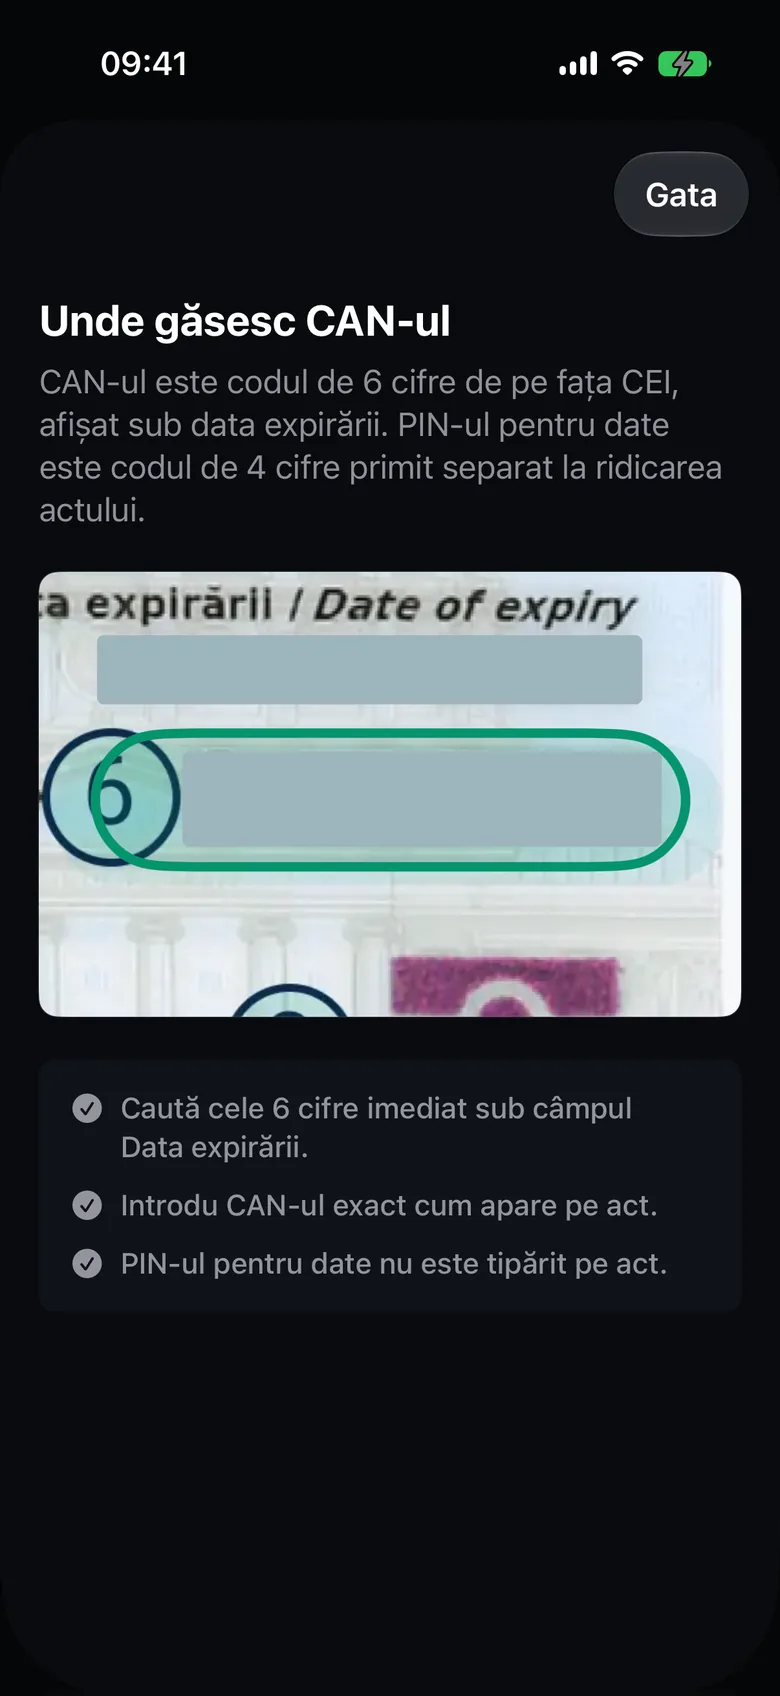
- The CAN: the 6-digit code printed on the front of the card, below the expiry date.
- The data PIN: the 4-digit code you received separately when you collected your eID. It isn’t printed on the card.
You’ll find details about each code in CAN and PIN codes.
Read your eID
- On the Home screen, tap Read your eID.
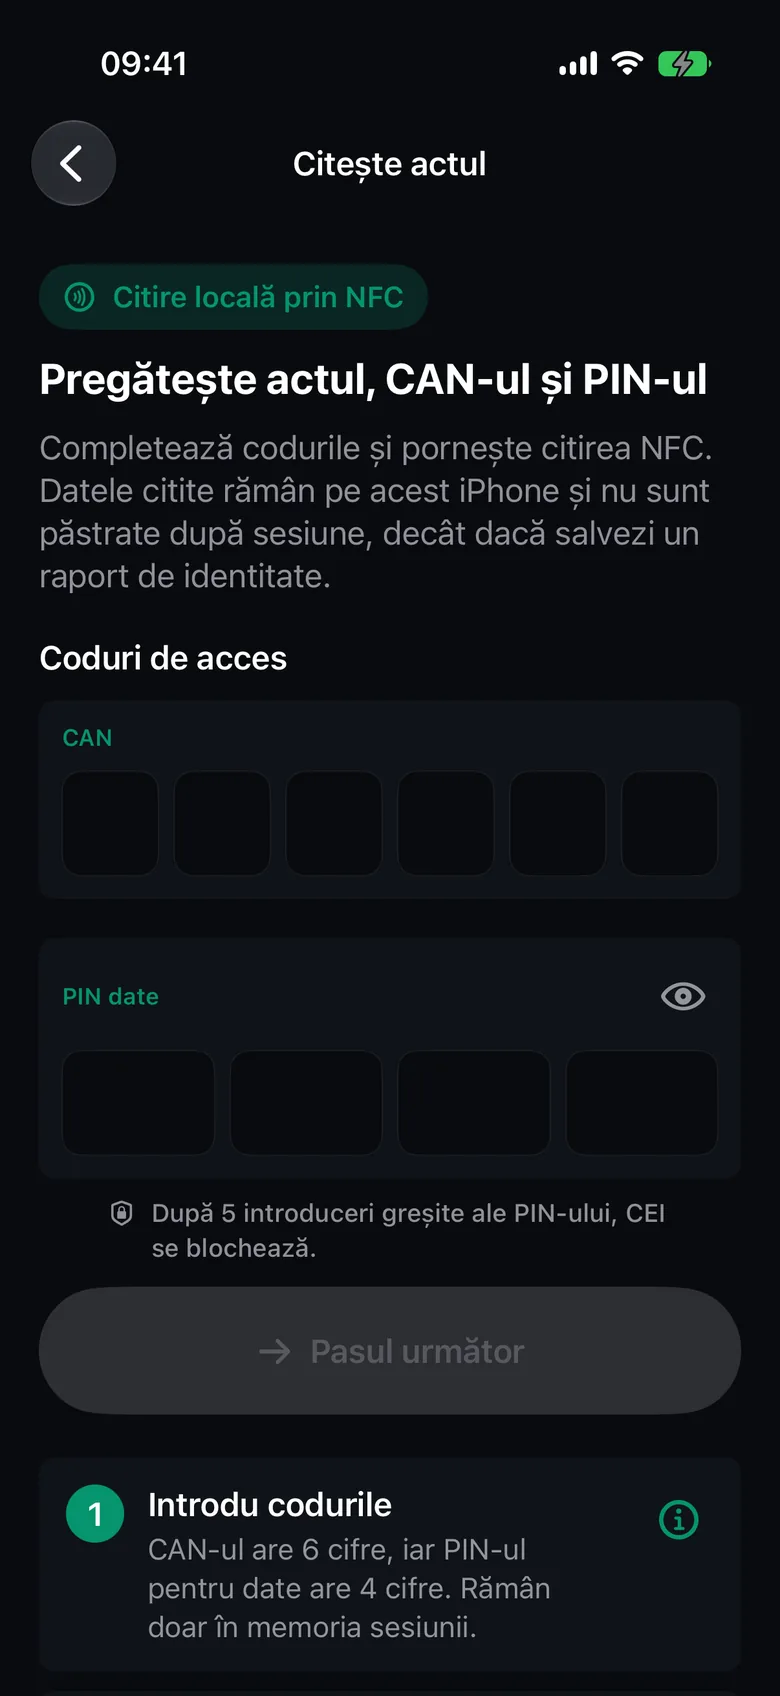
- Under Access codes, enter the CAN in the CAN field. After the sixth digit, the cursor moves to the PIN on its own.
- Enter your data PIN in the Data PIN field. The digits are hidden; you can show them with the eye button.
- Tap Next step. The button becomes active only when the CAN has 6 digits and the PIN has 4.
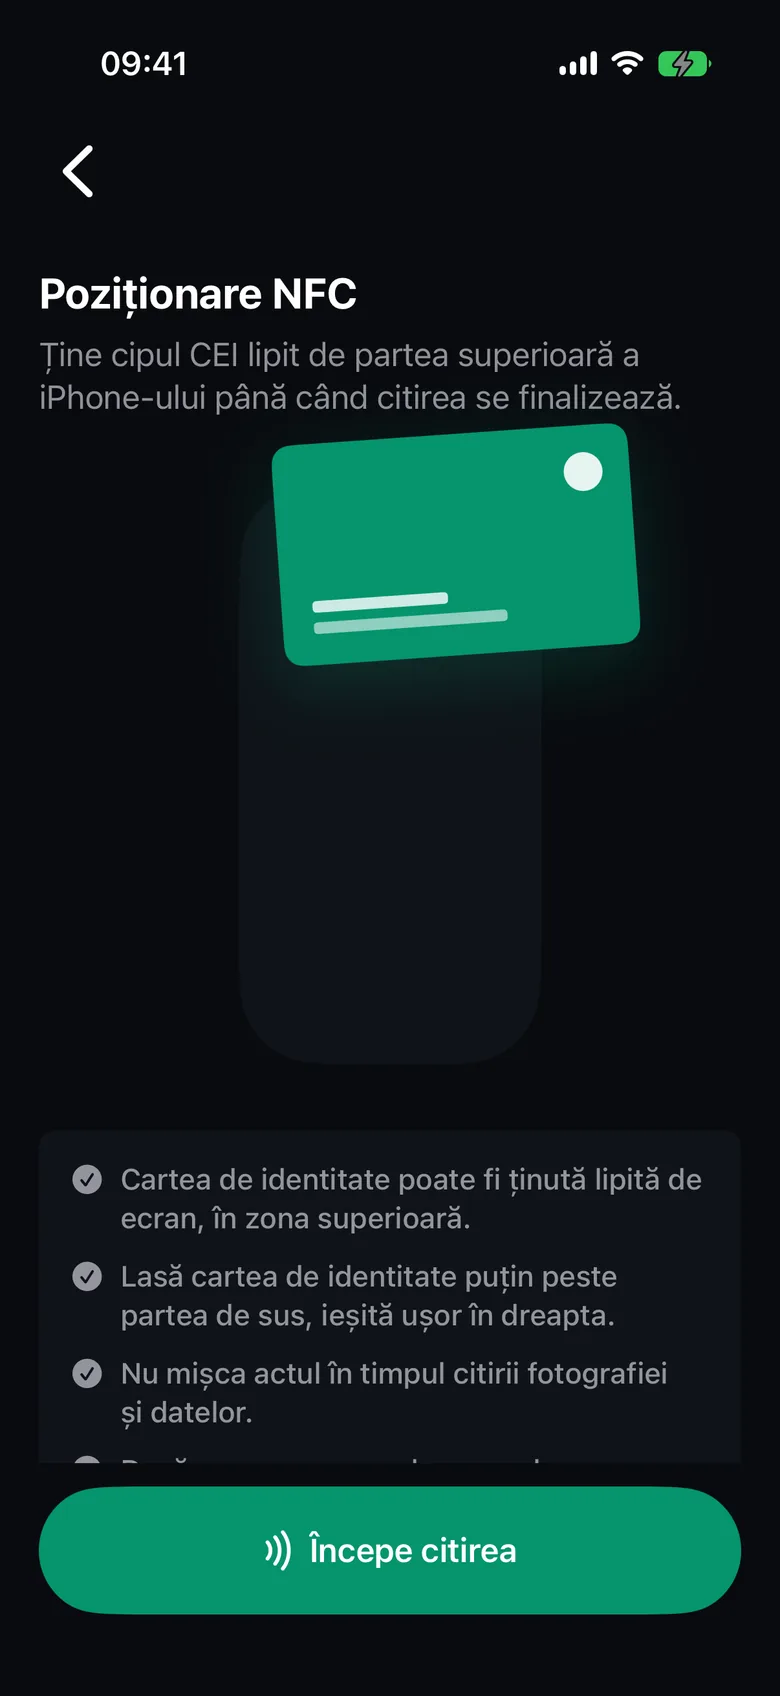
- The NFC position guide opens. Read the instructions and tap Start reading.
- When the iPhone’s NFC window appears, bring your eID close and hold it still until the end.
- When it finishes, the eID details screen opens.
Important
After 5 incorrect entries, the data PIN is blocked. When you have only one attempt left, the app doesn’t send the PIN until you confirm with Use the last attempt. A blocked PIN can be unblocked only through the official reset procedure.
Tip
Can’t find the CAN? Scroll below the Next step button. Next to the Enter the codes step, tap the info button (i). Where to find the CAN opens, with a picture of the eID. The (i) button next to the Hold the eID near the phone step opens the NFC position guide.
Note
Even when the app is set to English, a few progress messages in the iPhone’s NFC window appear in Romanian: “Autorizam fotografia…”, “Citim fotografia… N%”, “Autorizam semnatura…”, “Citim semnatura… N%”, “Autorizam datele…” and “Citim datele…”. They mean the app is authorizing and then reading the photo, the handwritten signature and the data. Everything is working normally.
How to hold your eID against the iPhone
The eID’s chip and the iPhone’s NFC reader only communicate over a few centimeters. The slightest movement can break the connection.
- Keep the eID’s chip against the top of the iPhone until the reading finishes: on the back, next to the cameras, or on the screen.
- On the screen, hold the eID near the top, sticking out a little over the edge, slightly to the right. The NFC position guide shows this too.
- On iPhone X to iPhone 17, the NFC reader is at the top, around the rear cameras. Reading usually works best with the eID against the back, next to the camera block.
- On iPhone SE, the NFC reader is on the back, at the top, next to the camera. Hold the eID’s chip against the back of the phone, just below the camera.
- Don’t move the eID while the photo and data are being read. The photo takes a few seconds.
- If a signal error appears, reposition the eID and try again.
On iPhone 18
On iPhone 18, the NFC reader is at the top right.
- Hold the eID over the top edge of the phone, sticking out slightly to the right, with the photo facing you.
- If the eID sticks out to the left, it isn’t read.
- Don’t touch the screen with the eID: it can tap “Cancel” and stop the reading.
- If the connection is lost, the app looks for the eID again. Keep it still in the same position.
If reading fails twice
After the NFC connection drops twice in a row, the We know this is frustrating screen opens on its own. It shows you where the NFC reader is on your iPhone model and what you can try:
- Take the phone out of its case, especially one with a magnet, metal or a card pocket.
- Try both sides of the eID: once with the photo facing you, once with the photo facing the phone.
- Try both the front and the back of the phone: the reader is at the top.
- Rest the phone and the eID on a table so they stay still.
Tap Try again to restart the reading, or Close to go back to the codes.
For error messages, see Troubleshooting.
The eID details screen
Under the Reading complete heading you’ll see the photo, the name and the document number. Tap the photo to enlarge it.
Below that is the list of data read from the eID, for example Surname, Given names, Personal numeric code, Date of birth, Date of expiry and Domicile. If the eID holds a handwritten signature, you’ll see it on the Handwritten signature card.
If the data authenticity check fails, the screen shows a warning above the data. When the check succeeds, no label appears.
With Create PDF report you can make a report with this data. See Identity report and proof of address.
Note
The data you read stays only in the app’s memory. When you leave the eID details screen, it’s erased. It’s kept only if you save an identity report.
Remember the CAN
After a successful read with a typed CAN, the app may ask Remember the CAN for this card. The offer appears only if your iPhone has a passcode set.
- Tap Remember. If you’d rather not, tap Not now.
- The next time you read, a Use the remembered CAN button appears below the CAN field, followed by the card’s name. If you’ve remembered the CAN for several cards, pick the card from Use a remembered CAN.
- Confirm with Face ID, Touch ID or your passcode. The CAN field fills in on its own.
The remembered CAN stays in the Keychain, on this iPhone only, and isn’t synced. PINs are never remembered. If the eID rejects the remembered CAN twice in a row, the app deletes it automatically. You can delete it at any time from Settings › App › Privacy.